📋 Article Content
Why a bot is needed for a Telegram channel
You’ve created a Telegram channel, written your first posts, attracted subscribers — and suddenly faced reality: daily content publication takes 2-3 hours. You’re tied to a schedule, can’t miss publication time, and a vacation turns into a problem altogether.
This is where the Telegram bot comes to the rescue — your personal automated assistant, working 24/7 without days off or vacations.
5 main reasons to create a bot for your channel
| Function | Without bot (manual) | With bot (automatic) | Time saving |
|---|---|---|---|
| 📅 Post scheduling | Need to be online exactly at 10:00, 14:00, 19:00 every day | You create 21 posts for the week, schedule them — everything is published automatically | 10+ hours/week |
| 🔗 RSS aggregation | You visit 5-10 news sites, copy news, format, publish manually | The bot automatically collects news from RSS, formats and publishes every 30 minutes | 2 hours/day |
| 🤖 AI generation | You write each post yourself, look for ideas, try to be creative | The bot generates posts via GPT-4 based on your prompt in 10 seconds | 1 hour/day |
| 📊 Analytics | You go into each post, record statistics in Excel | The bot collects all statistics automatically, builds graphs | 30 min/day |
| 🔄 Cross-posting | You copy a post, go into 5 different channels, paste manually | The bot publishes to all channels simultaneously with one click | 20 min/post |
Time saving summary: With a bot, you spend 30 minutes a week instead of 20-25 hours manually. This frees up time for strategy, analysis, and scaling.
Real statistics on bot usage in 2026
- 📈 87% of successful channels (10K+ subscribers) use bots for automation
- ⚡ Channels with autoposting publish 3-4 times more content
- 📊 Engagement rate of channels with regular publications is 45% higher
- 💰 Owners of automated channels earn 2.5 times more
- 😌 92% of bot users report reduced stress and burnout
💡 Fact: Pavel Durov (founder of Telegram) himself recommends using bots for channels: “Bots are the future of communication automation. They do what would take a person 10 hours, in 10 seconds.”
4 real bot usage cases
📰 News channel
Task: Publish 20-30 news items per day from various sources
Solution: The bot aggregates RSS from 10 news sites, filters by keywords, publishes automatically
Result: From 6 hours/day to 0 hours (full automation)
🎓 Educational channel
Task: Publish an English lesson daily at 10:00
Solution: The bot schedules 30 lessons per month, publishes exactly at 10:00, even if the author is on vacation
Result: Regularity = +200% subscribers in 3 months
💼 Business channel
Task: Publish updates to 5 channels simultaneously (main + regional)
Solution: The bot duplicates the post to all 5 channels with 1 click
Result: From 30 min to 2 minutes per publication
🎨 Creative channel
Task: Generate motivational quotes with unique images
Solution: The bot creates quotes via GPT-4, generates images via DALL-E, publishes 3 times/day
Result: 100% unique content without manual work
Now that you understand WHY a bot is needed, let’s move on to a step-by-step guide on HOW to create it.
How a Telegram bot works: technical overview for beginners
Before creating a bot, it’s important to understand its basic operating principles. Don’t worry, I’ll explain in simple language, without complex terms.
What is a Telegram bot?
A Telegram bot is a special account that is controlled by a program (not a human). It has its unique identifier (@username), can receive and send messages, but behind it is code, not a living person.
In simple terms: If a regular Telegram account is you with a phone, then a bot is a robot that executes commands automatically.
Anatomy of a Telegram bot
| Component | What it is | Example |
|---|---|---|
| @Username | Unique bot name (always ends with bot) |
@mychannel_autopost_bot |
| Bot Token | Secret key for managing the bot (like a password) | 7234567890:AAHdqTcvCH1v… |
| API | Interface through which the program controls the bot | Telegram Bot API |
| Webhook/Polling | Method for receiving new messages | Webhook = push, Polling = pull |
How a bot publishes posts to a channel: step-by-step scheme
1. You create a bot via @BotFather
   ↓
2. BotFather gives you a token (secret key)
   ↓
3. You add the bot as a channel administrator
   ↓
4. You give the bot "Post Messages" rights
   ↓
5. You connect the token to TGADM.IN
   ↓
6. TGADM.IN uses the token to send commands to the bot
   ↓
7. The bot publishes the post to the channel via Telegram API
   ↓
8. Subscribers see the post (on behalf of the channel, not the bot)
✅ Important: Subscribers DO NOT see the bot. Posts are published on behalf of the channel. The bot works “behind the scenes”.
2 ways to create and use a bot
| Method | Difficulty | Time |
|---|
| Command | Purpose | When to use |
|---|---|---|
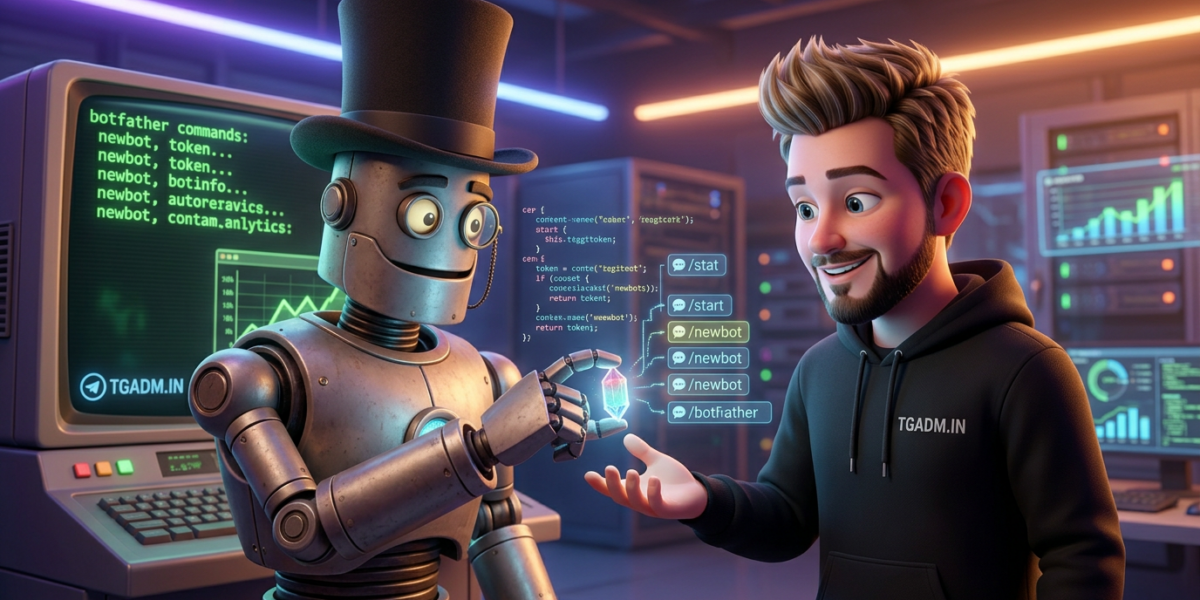
/newbot |
Create a new bot | First time or for a new channel |
/mybots |
List of your bots | Manage existing bots |
/token |
Get bot token | If you lost/forgot the token |
/setuserpic |
Change bot avatar | Bot branding |
/deletebot |
Delete bot permanently | CAUTION: irreversible operation! |
Step-by-step bot creation via BotFather
Now let’s move on to the most interesting part — creating your first bot. The process takes literally 2-3 minutes.
Step 1: Launching the /newbot command
- Open chat with @BotFather
- Send the command
/newbot - BotFather will reply:
Alright, a new bot. How are we going to call it? Please choose a name for your bot.Step 2: Choosing the bot’s name (Display Name)
This is the name users will see. It can be anything:
- ✅ Any language (Ukrainian, English, emoji)
- ✅ Any length (up to 255 characters)
- ✅ Spaces and special characters allowed
- ✅ Does not have to be unique
Examples of good names:
| Bot Name | For what purpose |
|---|---|
| Autoposting News UA | News channel |
| My Channel Bot 📰 | Personal channel |
| Business Channel Manager | Business channel |
| RSS Aggregator Bot | News aggregator |
Example dialogue:
BotFather: Alright, a new bot. How are we going to call it? Please choose a name for your bot.

You: Autoposting My Channel

BotFather: Good. Now let's choose a username for your bot...
Step 3: Choosing the bot’s username (most important!)
Username is the bot’s unique identifier in the Telegram system.
STRICT RULES:
- 🔤 Latin characters only: a-z, A-Z (Cyrillic forbidden)
- 🔢 Numbers: 0-9 (allowed, but not at the beginning)
- _ Underscore: allowed
- 🤖 Ending: MUST be
botorBot - 📏 Length: minimum 5 characters
- 🚫 Forbidden: spaces, special characters (!@#$%)
Examples of CORRECT usernames:
| Username | Status | Note |
|---|---|---|
mychannel_bot |
✅ Ideal | Simple, clear |
news_ukraine_autopost_bot |
✅ Good | Describes purpose |
my_super_bot |
✅ OK | Universal |
channel2026bot |
✅ OK | With numbers (not at the beginning) |
Examples of INCORRECT usernames:
| Username | Error | How to fix |
|---|---|---|
мій_бот |
❌ Cyrillic | my_bot |
mychannel |
❌ No “bot” | mychannel_bot |
my channel bot |
❌ Spaces | my_channel_bot |
abc |
❌ Less than 5 characters | abc_bot |
super!!!bot |
❌ Special characters | super_bot |
Dialogue continuation:
BotFather: Good. Now let's choose a username for your bot. It must end in `bot`. Like this, for example: TetrisBot or tetris_bot.

You: mychannel_autopost_bot

BotFather: Done! Congratulations on your new bot. You will find it at t.me/mychannel_autopost_bot. You can now add a description, about section and profile picture for your bot, see /help for a list of commands.

Use this token to access the HTTP API:
7234567890:AAHdqTcvCH1vGWJxfSeofSAs0K5PALDsaw

Keep your token secure and store it safely, it can be used by anyone to control your bot.

For a description of the Bot API, see this page: https://core.telegram.org/bots/api
Step 4: Saving the token (CRITICALLY IMPORTANT!)
Immediately after creation, BotFather will send you a token — a long code like:
7234567890:AAHdqTcvCH1vGWJxfSeofSAs0K5PALDsaw🔥 THIS IS THE MOST IMPORTANT PART! The token is the key to full bot management. Whoever has the token controls the bot.
WHAT TO DO NEXT:
- 📋 Copy the token (select, Ctrl+C or long tap → Copy)
- 💾 Save in a safe place:
- Password manager (1Password, Bitwarden, LastPass)
- Encrypted notes (Apple Notes with password, Google Keep)
- Text file on your computer (NOT on Google Drive!)
- ✅ Check that the token is copied completely (from the first digit to the last letter)
More details on token security — in the next section.
Bot Token: what it is and how to protect it
A token (Bot Token, API Token) is the most important security element of your bot. Let’s delve into the details.
Bot Token Anatomy
7234567890:AAHdqTcvCH1vGWJxfSeofSAs0K5PALDsaw
    ↑             ↑
  Bot ID      Secret Key
(public)   (SECRET!)
Two parts of the token:
| Part | What it is | Example | Security |
|---|---|---|---|
| Bot ID | Public bot identifier (like username) | 7234567890 | Not secret |
| Secret Key | Secret key for management | AAHdqTcvCH1vGWJxfSeofSAs0K5PALDsaw | 🔥 CRITICALLY SECRET |
What can be done with a token: dangers
If an attacker obtains your token, they will be able to:
- ❌ Publish anything on behalf of your bot
- ❌ Read all messages sent to the bot
- ❌ Delete posts from the channel
- ❌ Change existing posts
- ❌ Receive subscriber data (if the bot operates in private chats)
- ❌ Block the bot with mass spam
Real case: In 2024, 37 channels in Ukraine were compromised due to token leaks in public GitHub repositories. Attackers published fake news and fraudulent links.
Token security rules (MANDATORY)
🚫 NEVER DO THIS:
| Action | Risk | Consequences |
|---|---|---|
| Publishing the token in chats/posts | 🔴 Critical | Instant compromise |
| Screenshot with token | 🔴 Critical | Token can get online |
| GitHub public repository | 🔴 Critical | Bots scan repositories for tokens |
| Google Drive/Dropbox unprotected | 🟠 High | If cloud is compromised — bot will be compromised |
| Email without encryption | 🟠 High | Email is easy to intercept |
| Transfer via Telegram | 🟡 Medium | Messages can be stored |
✅ SAFE STORAGE METHODS:
- Password managers (best)
- 1Password (paid, )
- Bitwarden (free + premium plan)
- LastPass (freemium)
- KeePass (free, local)
- Encrypted notes
- Apple Notes with password (for iOS/Mac)
- Standard Notes (cross-platform)
- Notion with private pages
- Environment variables (for developers)
.envfile (add to.gitignore!)- Environment Variables on the server
- Official services with encryption
- TGADM.IN — stores tokens in encrypted form with the prefix
tg_encrypted: - AWS Secrets Manager
- Azure Key Vault
- TGADM.IN — stores tokens in encrypted form with the prefix
What to do if the token is compromised
Signs of compromise:
- 🚨 Posts appear in the channel that you did not publish
- 🚨 The bot sends spam to private chats
- 🚨 The bot stopped responding to commands
- 🚨 You saw the token in a public place (GitHub, chat, post)
URGENT PROCEDURE (act NOW):
- 🔴 Revoke the token
- Find @BotFather
- Send
/mybots - Select your bot
- Click “API Token”
- Select “Revoke current token”
- Confirm (ATTENTION: the old token will stop working)
- 🟢 Get a new token
- In the same menu, select “Generate New Token”
- BotFather will send a new token
- Save it securely
- 🔄 Update the token in all services
- TGADM.IN
- Your own code (if any)
- Other automation services
- 🔍 Check publication history
- Delete suspicious posts
- Inform subscribers about the incident (optional)
💡 Pro Tip: Create a separate bot for each channel. If one token is compromised — other channels will not be affected.
How TGADM.IN protects your tokens
When you connect a bot to TGADM.IN, the following happens:
- You insert the token into the form
- The system encrypts the token using the AES-256 algorithm (military standard)
- In the database,
tg_encrypted:[encrypted data]is stored - During publication, the token is decrypted only in RAM for 1-2 seconds
- After publication, the decrypted token is immediately removed from memory
Result: Even if someone compromises the TGADM.IN database (unlikely), they will only see encrypted data that cannot be decrypted without the secret key.
Adding a bot to a channel as an administrator
Creating a bot is only half the battle. For the bot to be able to publish posts, it must be added to the channel as an administrator with appropriate permissions.
Why should the bot be an administrator?
Regular channel subscribers cannot publish posts. Only administrators have publishing rights. A bot is a technical account, so it also falls under this rule.
Step-by-step instructions (mobile app)
For Android:
- Open your Telegram channel
- Tap on the channel name at the top of the screen
- Scroll down to the section “Administrators”
- Tap “Add Administrator”
- In the search, enter @username of your bot (the one ending in “bot”)
- Select the bot from the list
- Configure permissions (see next section)
- Tap the checkmark ✓ or “Done”
For iOS:
- Open the channel
- Tap on the channel name → “Edit”
- Scroll to “Administrators”
- “Add Administrator”
- Find the bot via search
- Configure permissions
- “Done” in the top right corner
Step-by-step instructions (desktop)
Telegram Desktop (Windows/Mac/Linux):
- Open the channel in Telegram Desktop
- Click on the three dots ⋮ next to the channel name
- Select “Manage Channel” (Manage Channel)
- In the left menu, go to “Administrators”
- Click “Add Administrator”
- In the search, enter @username of the bot
- Configure bot permissions
- “Save”
What to do if the bot is not found?
Typical reasons:
| Problem | Reason | Solution |
|---|---|---|
| “Bot not found” | Incorrect @username | Check the username in @BotFather (/mybots) |
| “User does not exist” | Typo in the name | Copy the username from BotFather and paste |
| Bot found, but not added | Bot is already an administrator or blocked | Check the list of administrators |
| “Privacy settings” | Bot has privacy settings | First, send /start to the bot |
Configuring bot permissions for auto-posting
After adding the bot as an administrator, you need to configure its permissions. This is critically important — without the correct permissions, the bot will not be able to publish posts.
All available administrator rights
| Right | What it allows | Required for auto-posting? |
|---|---|---|
| Change Channel Info | Change channel name, description, avatar | ❌ No |
| Post Messages | Publish new posts | ✅ MANDATORY |
| Edit Messages of Others | Edit posts of other admins | ✅ MANDATORY |
| Delete Messages of Others | Delete posts of other admins | ✅ Recommended |
| Add Subscribers | Add new subscribers | ❌ No |
| Pin Messages | Pin posts | ⭕ Optional |
| Add Administrators | Add new admins | ❌ NOT recommended |
| Manage Voice Chats | Manage voice chats | ❌ No |
Minimum set of rights for basic auto-posting
3 mandatory rights:
- ✅ Post Messages — so the bot can publish new posts
- ✅ Edit Messages — so the bot can edit scheduled posts
- ✅ Delete Messages — so the bot can delete erroneous posts
💡 Principle of least privilege: Grant the bot only the rights that are actually needed. If the bot does not manage administrators — do not give it the “Add Administrators” right. This is protection against compromise.
Extended set of rights (for full automation)
If you plan to use advanced TGADM.IN features:
- ✅ Post Messages
- ✅ Edit Messages
- ✅ Delete Messages
- ✅ Pin Messages (for automatic pinning of important posts)
- ⭕ Change Channel Info (only if the bot will update the channel description)
What happens if the necessary rights are not granted?
| Missing right | Consequences | Error in TGADM.IN |
|---|---|---|
| Post Messages | The bot will NOT be able to publish posts | “Error: Bot doesn’t have permission to post” |
| Edit Messages | Will not be able to edit scheduled posts | “Error: Cannot edit message” |
| Delete Messages | Will not be able to delete an erroneous post | “Error: Cannot delete message” |
How to check bot rights after adding
- Open channel settings
- Go to “Administrators”
- Find your bot in the list
- Tap/click on the bot → you will see a list of rights with checkmarks
- Make sure that Post Messages, Edit Messages, and Delete Messages are active
✅ Done! Your bot now has all the necessary rights to operate. Let’s proceed to connect the automation platform.
The problem of self-programming a bot
At this point, many people think: “Okay, the bot is created and added to the channel. What’s next? How do I make it publish posts?”
And here begins the difficult part…
What is needed for self-development
Minimum technical stack:
| Technology | Purpose | Time to learn |
|---|---|---|
| Python/Node.js/PHP | Programming language for the bot | 2-6 months (beginner) |
| Telegram Bot API | API for interacting with Telegram | 1-2 weeks |
| Libraries (python-telegram-bot, telegraf.js) | Ready-made solutions for simplification | 1 week |
| Database (PostgreSQL, MongoDB) | Storing scheduled posts | 2-4 weeks |
| Cron Jobs / Task Scheduler | Automatic launch of publications | 1 week |
| Hosting (VPS, AWS, Heroku) | Server for bot operation 24/7 | 1-2 weeks |
| Git, Docker (optional) | Versioning and deployment | 2-3 weeks |
Total time: 3-8 months for a beginner, 2-4 weeks for an experienced developer.
Code example (Python + python-telegram-bot)
Here is the minimal code for publishing one post:
import telegram
from telegram.ext import Updater
import schedule
import time

# Ваш токен
TOKEN = "7234567890:AAHdqTcvCH1vGWJxfSeofSAs0K5PALDsaw"
CHANNEL_ID = "@your_channel"

bot = telegram.Bot(token=TOKEN)

def publish_post():
    bot.send_message(
        chat_id=CHANNEL_ID,
        text="This is a test post from the bot!",
        parse_mode="HTML"
    )
    print("Post published!")

# Планування публікації щодня о 10:00
schedule.every().day.at("10:00").do(publish_post)

while True:
    schedule.run_pending()
    time.sleep(60)
What else is needed:
- 📝 Interface for creating posts (web form or admin panel)
- 💾 Database for storing drafts
- 🕐 Scheduler with date/time selection
- 📊 Analytics system
- 🔐 Security (token encryption, authentication)
- 🔄 Error handling (what if Telegram API is unavailable?)
- 📱 Support for various media types (photos, videos, documents)
- 🎨 Text formatting (bold, italic, links)
Realistic estimate: 1500-3000 lines of code for a complete solution.
Costs of self-development
| Costs | Description | Frequency |
|---|---|---|
| Development time (80-200 hours) | Your time or hiring a programmer | One-time |
| VPS hosting (DigitalOcean, AWS) | Required for bot operation | Monthly |
| Domain (optional) | For webhook and administration | Annually |
| Database (managed) | Data storage | Monthly |
| Support and updates | 5-10 hours/month | Constantly |
| TOTAL: | Significant upfront investment + ongoing costs |
Alternative: TGADM.IN
| Criterion | Self-development | TGADM.IN |
|---|---|---|
| Time to launch | 3-8 months | 5-10 minutes |
| Technical knowledge | Programming, DevOps, API | Not required |
| Getting started | Significant investment in development | Free trial period |
| Ongoing costs | Hosting, DB, support + your time | Available plans (all inclusive) |
| Support | You solve problems yourself | 24/7 support in Telegram |
| Updates | You monitor API changes yourself | Automatic updates |
| Features | Only what you programmed | New ones are constantly added |
💡 Conclusion: Self-development makes sense if you are:
- A professional programmer who wants to learn the Telegram Bot API
- Have very specific requirements that are not available in ready-made solutions
- Manage 100+ channels and need your own infrastructure
For everyone else — a ready-made platform saves months of time and significant resources.
TGADM.IN: a ready-made solution in 5 minutes
TGADM.IN — is a SaaS platform for automating Telegram channels without programming. All you need is to connect the bot and start using it.
What you get out-of-the-box
| Feature | Description | Time Savings |
|---|---|---|
| 📅 Post Scheduler | Create posts and schedule them weeks in advance. Publication occurs automatically at the specified time with second-level precision. | 10+ hrs/week |
| 🔗 RSS Integration | Connect RSS feeds from any websites. The bot automatically collects new publications and posts them to the channel with a configured frequency. | 2 hrs/day |
| 🤖 AI Generation (GPT-4 + DALL-E) | Generate post texts and images directly in the editor. Describe what you need — AI will create it in 10 seconds. | 1-2 hrs/day |
| 📊 Detailed Analytics | Reach, views, engagement rate, best time to publish — all in one dashboard with graphs. | 30 min/day |
| 🔄 Cross-Posting | Publish one post simultaneously to 10+ channels. Or configure unique content for each. | 20 min/post |
| 📁 File Storage | Upload images, videos, documents. Organize into folders. Use repeatedly. | 15 min/day |
| 👥 Multichannel Management | Manage an unlimited number of channels from one account. Switch between them with 1 click. | Effortless Scaling |
| 🔐 Token Encryption | Tokens are stored in encrypted form. Even platform administrators cannot see them. | Security Assurance |
Real User Cases TGADM.IN
📊 Case #1: News Channel “Tech UA”
Before TGADM.IN:
- Publishing 15-20 news items/day manually
- 5-6 hours daily working with the channel
- Missed important news due to lack of time
- Engagement rate: 4.2%
After connecting TGADM.IN:
- RSS from 8 sources → auto-publishing 40-50 news items/day
- AI filtering and rewriting content
- Time spent: 30 minutes/day (curation only)
- Engagement rate: 7.8% (+85%)
- Subscribers: 8,500 → 24,300 in 4 months
💰 Monetization: Significant increase in ad revenue
💬 Owner says: “TGADM.IN allowed scaling the channel 3 times without hiring additional people. Now I focus on strategy, not routine work.”
🎓 Case #2: Educational Channel “Англійська щодня”
Task: Publish an English lesson daily at 09:00, even during vacation
Solution with TGADM.IN:
- Created 90 lessons in 2 weeks
- Scheduled for 3 months ahead
- Went on vacation for a month
- The channel worked without interruptions
Result:
- 0 missed publications per year
- Subscribers: 2,100 → 12,800
- Conversion to paid course: 3.2%
- Revenue: from subscriptions
💬 Owner says: “Previously, I missed publications due to illness or travel. Now I can rest easy — the channel works by itself.”
TGADM.IN Plans
| Plan | Channels | AI requests/day | RSS feeds |
|---|---|---|---|
| Free Trial | Unlimited | 50 | 10 |
| Starter | 3 channels | 100 | 20 |
| Pro | 10 channels | 500 | Unlimited |
| Business | Unlimited | 2000 | Unlimited |
💰 Benefits of Automation:
Time savings: 15 hours/week × 4 weeks = 60 hours/month

Freed-up time can be used for:
- Creating new content
- Developing channel strategy
- Engaging subscribers
- Monetization and partnerships

TGADM.IN quickly pays for itself through saved time
Connecting the bot to TGADM.IN
Now that you’ve created the bot and added it to the channel, there’s one last step — connecting it to the automation platform.
Step-by-step connection guide
Step 1: Registration on TGADM.IN
- Go to tgadm.in
- Click “Try for free” or “Log in”
- Select “Log in via Telegram”
- Telegram will open automatically → click “Confirm”
- You will immediately enter the dashboard
🔒 Security: TGADM.IN uses OAuth 2.0 authorization via Telegram. Your Telegram password remains secure — we never see it.
Step 2: Adding a bot
- In the left menu, click “Bots” or “Bots”
- Click the “+ Add bot” button
- In the “Bot Token” field, paste your token from BotFather
- Enter a name for convenience (e.g., “Main channel bot”)
- Click “Connect”
What happens behind the scenes:
1. TGADM.IN verifies token validity
   ↓
2. Retrieves bot information (@username, ID)
   ↓
3. Encrypts the token with AES-256 algorithm
   ↓
4. Stores in the database as tg_encrypted:[encrypted_data]
   ↓
5. Shows status: "✅ Bot connected"
Step 3: Selecting a channel
- After connecting the bot, you will see a list of all channels where the bot is an administrator
- Select the desired channel from the list
- Click “Connect channel”
- TGADM.IN will automatically check bot permissions
- If all permissions are present → “✅ Channel ready for work”
If the system detects a problem with permissions:
| Error | What to do |
|---|---|
| “Bot does not have permission to publish” | Enable “Post Messages” in administrator permissions |
| “Bot cannot edit posts” | Enable “Edit Messages of Others” |
| “Channel not found” | Make sure the bot is added as an administrator |
Step 4: Connection check
TGADM.IN will automatically send a test message to your channel:
✅ TGADM.IN successfully connected!

Your bot is ready for automation.
Now you can:
• Schedule posts weeks in advance
• Connect RSS feeds
• Generate content via AI
• Analyze statistics

Create your first automated post in the "Posts" section.
If this message appeared in the channel — everything is working! ✅
What to do if the connection failed?
Troubleshooting:
| Symptom | Probable cause | Solution |
|---|---|---|
| “Invalid token” | Typo or incomplete token | Copy the token again from BotFather |
| “Channel not displayed” | Bot is not an administrator | Add the bot in channel settings |
| “Insufficient permissions” | Not all permissions granted | Check the permissions checklist above |
| Test post did not appear | Telegram API temporarily unavailable | Wait 1-2 minutes and try again |
💬 Need help? TGADM.IN support is available 24/7 in the Telegram chat: @tgadm_in_support. Average response time: 5-15 minutes.
First test publication
The best way to make sure everything is working is to create and publish a test post.
Creating your first automated post
- In the TGADM.IN dashboard, go to the “Posts” section
- Click “+ Create post”
- The post editor will open
Editor interface
Main elements:
- 📝 Text field — write post text (up to 4096 characters)
- 🎨 Formatting — bold, italic, monospace, links
- 📷 Media — upload photo, video, document, audio
- ✨ AI button — content generation via GPT-4 / DALL-E
- 📅 Scheduler — select publication date and time
- 👁 Preview — how the post will look in the channel
Example test post
Write the following text:
✅ Automation testing

This is the first post published via TGADM.IN!

What's now available:
• 📅 Scheduling posts months in advance
• 🤖 AI generation of texts and images
• 🔗 RSS automation
• 📊 Detailed analytics

No more manual publishing! 🎉

#test #automation #TGADMIN
Publication: now vs scheduled
Option 1: Publish now
- At the bottom of the editor, select “Publish now”
- Click “Publish”
- In 1-2 seconds, the post will appear in the channel
- TGADM.IN will show the message: “✅ Post published”
Option 2: Schedule (recommended for testing)
- Select “Schedule publication”
- Select date: today
- Select time: 5 minutes from current time
- Click “Schedule”
- The post will appear in the “Scheduled” section
- After 5 minutes, it will be automatically published
⏰ Publication accuracy: TGADM.IN publishes with an accuracy of ±5 seconds from the scheduled time. If you set 14:00:00, the post will appear between 13:59:55 and 14:00:05.
Checking the result
What to check after publication:
- ✅ The post appeared in the channel at the exact time
- ✅ Text is formatted correctly (bold, italic)
- ✅ Media (if added) is displayed correctly
- ✅ The post is published on behalf of the channel, not the bot
- ✅ In TGADM.IN, the status changed to “Published”
If everything works — congratulations! Your bot is successfully configured! 🎉
Advanced automation features
After successful testing, you can proceed to the advanced features of TGADM.IN.
1. RSS automation
How it works:
- You add an RSS feed from any website (news, blog, YouTube)
- TGADM.IN checks the feed every 30 min / 1 hour / 3 hours (configurable)
- When a new publication appears, a post is automatically created
- You can configure templates, filters, AI processing
Example: A news channel connects RSS from TSN.ua, BBC News, Reuters. The bot publishes 40-50 news items per day fully automatically.
2. AI content generation
3 ways to use AI:
| Function | What it does | Example usage |
|---|---|---|
| Write post | GPT-4 creates a post from scratch based on your prompt | “Write a motivational post about achieving goals, 150 words” |
| Continue text | You write the beginning, AI completes the end | Beginning: “5 reasons to learn Python…” → AI adds 5 reasons |
| Improve | AI rewrites your text, makes it better | Draft → literary text with good structure |
| Generate image | DALL-E creates a unique image based on a description | “Futuristic city at sunset, 4K, realistic” |
3. Cross-posting to multiple channels
Publish one post simultaneously to 5-10-20 channels with 1 click:
- Create a post in the editor
- In the “Channels” section, select multiple channels (checkbox)
- Click “Publish to all selected”
- The post will instantly appear in all channels
Savings: If you have 5 channels and publish 3 posts/day, cross-posting saves 1.5 hours/day.
4. Analytics and Statistics
Metrics tracked by TGADM.IN:
- 📊 Views: How many times the post was opened
- 👥 Reach: How many unique users saw it
- ❤️ Reactions: Likes, dislikes, emojis
- 📤 Forwards: How many times it was shared
- 💬 Comments: Number of comments (if enabled)
- 📈 Engagement Rate: (Reactions + Comments + Forwards) / Reach × 100%
Useful insights:
- 🕐 Best time to publish: When your audience is most active
- 📊 Top 5 posts: Which posts received the most engagement
- 📉 Growth dynamics: How many subscribers join/leave daily
Common Errors and Their Solutions
Even when following the instructions, problems may arise. Here are the most common ones:
Error #1: “Bot is not publishing posts”
Possible reasons:
| Reason | How to check | How to fix |
|---|---|---|
| Bot is not an administrator | Channel → Administrators → Look for the bot in the list | Add the bot as an administrator |
| No “Post Messages” permission | Channel → Administrators → Tap on the bot → Check permissions | Enable “Post Messages” |
| Incorrect token | TGADM.IN → Bots → Bot status | Reconnect the bot with a new token |
| Token revoked | Try to publish — there will be an “Unauthorized” error | Create a new token in @BotFather |
Error #2: “Channel does not appear when connecting”
Reasons and solutions:
- ❌ Bot not added to the channel → Add as an administrator
- ❌ You added the bot to a group, not a channel → TGADM.IN only works with channels
- ❌ Channel belongs to another account → Log in to the correct Telegram account
- ❌ Channel deleted → Create a new one
Error #3: “Posts are not published on time”
Normal deviations: ±5-10 seconds (this is normal)
Large delays (30+ minutes):
- 🌐 Telegram API overloaded → Wait, try again later
- 🔄 Telegram technical maintenance → Check status.telegram.org
- ⏰ Incorrect time zone → Check settings in TGADM.IN
Error #4: “Media is not uploading”
Telegram limitations:
| File type | Maximum size | Supported formats |
|---|---|---|
| Photo | 10 MB (via bot), 5 MB (recommended) | JPG, PNG, WebP |
| Video | 50 MB | MP4, MOV, AVI |
| Document | 50 MB (up to 2GB with Telegram Premium) | Any |
| Audio | 50 MB | MP3, OGG, M4A |
Solution: Compress the file or split it into parts.
Frequently Asked Questions (FAQ)
Do I need to pay to create a bot?
No, creating a bot via @BotFather is completely free. You can create an unlimited number of bots. TGADM.IN has a free trial period for testing all features.
How many bots can I create?
Telegram does not set limits. You can create as many as you want. It is recommended to create a separate bot for each channel for security.
Can one bot be used for multiple channels?
Yes, one bot can manage an unlimited number of channels. But this is a risk: if the token is compromised, all channels are at risk. It’s better to have a separate bot for each channel.
What happens if I delete a bot?
If you delete a bot via @BotFather (/deletebot):
- ❌ The token will stop working immediately
- ❌ All scheduled posts will not be published
- ✅ Already published posts will remain in the channel
- ⚠️ The operation is irreversible — it’s impossible to restore the bot
Do subscribers see that posts are published by a bot?
No! Posts are published on behalf of the channel, not the bot. Subscribers see a standard post without any automation tags. The bot works “behind the scenes”.
How long can a bot work without intervention?
With proper setup via TGADM.IN, the bot can work for months without intervention. You only need to:
- 📅 Plan content in advance
- 🔄 Set up RSS (if needed)
- 💳 Pay for TGADM.IN subscription
Can the bot be transferred to another platform?
Yes, the bot is your property. The token can be used with any service or your own code. You are not tied to TGADM.IN.
Conclusion and Next Steps
Congratulations! Now you know how to create a bot for a Telegram channel from A to Z. Let’s summarize:
What you learned
- ✅ Why a bot is needed for a channel (saving 15-25 hours/week)
- ✅ How a Telegram bot works technically
- ✅ How to find the official BotFather
- ✅ Step-by-step bot creation (name, username, token)
- ✅ How to protect the bot’s token (security is critical)
- ✅ Adding the bot to the channel as an administrator
- ✅ Setting up correct permissions (Post, Edit, Delete)
- ✅ Why self-programming is difficult (3-8 months + significant investment)
- ✅ Connecting to TGADM.IN in 5 minutes
- ✅ First test publication and advanced features
Your action plan for the next 24 hours
| Time | Task | Duration |
|---|---|---|
| Now | Open @BotFather and create a bot | 3 minutes |
| +5 min | Save the token in a password manager | 2 minutes |
| +10 min | Add the bot to the channel as an administrator | 2 minutes |
| +15 min | Register on TGADM.IN | 1 minute |
| +20 min | Connect the bot and channel | 3 minutes |
| +25 min | Publish a test post | 2 minutes |
| +30 min | Create a content plan for the week (7 posts) | 30-60 minutes |
| Next day | Set up RSS and AI generation | 20 minutes |
Result in 24 hours: A fully automated channel that publishes content without your involvement.
🚀 Ready to automate your Telegram channel?
Join 5,000+ channel owners who are already saving 15+ hours per week
- ✅ Auto-posting and scheduler
- ✅ RSS integration
- ✅ AI content generation
- ✅ Post analytics
Free plan • No credit card required • Setup in 5 minutes
Share this article: